Advanced build with Dockerfile
If you want something done right, do it yourself. No plugin knows your application like you do. So the next level is writing optimized Dockerfiles.
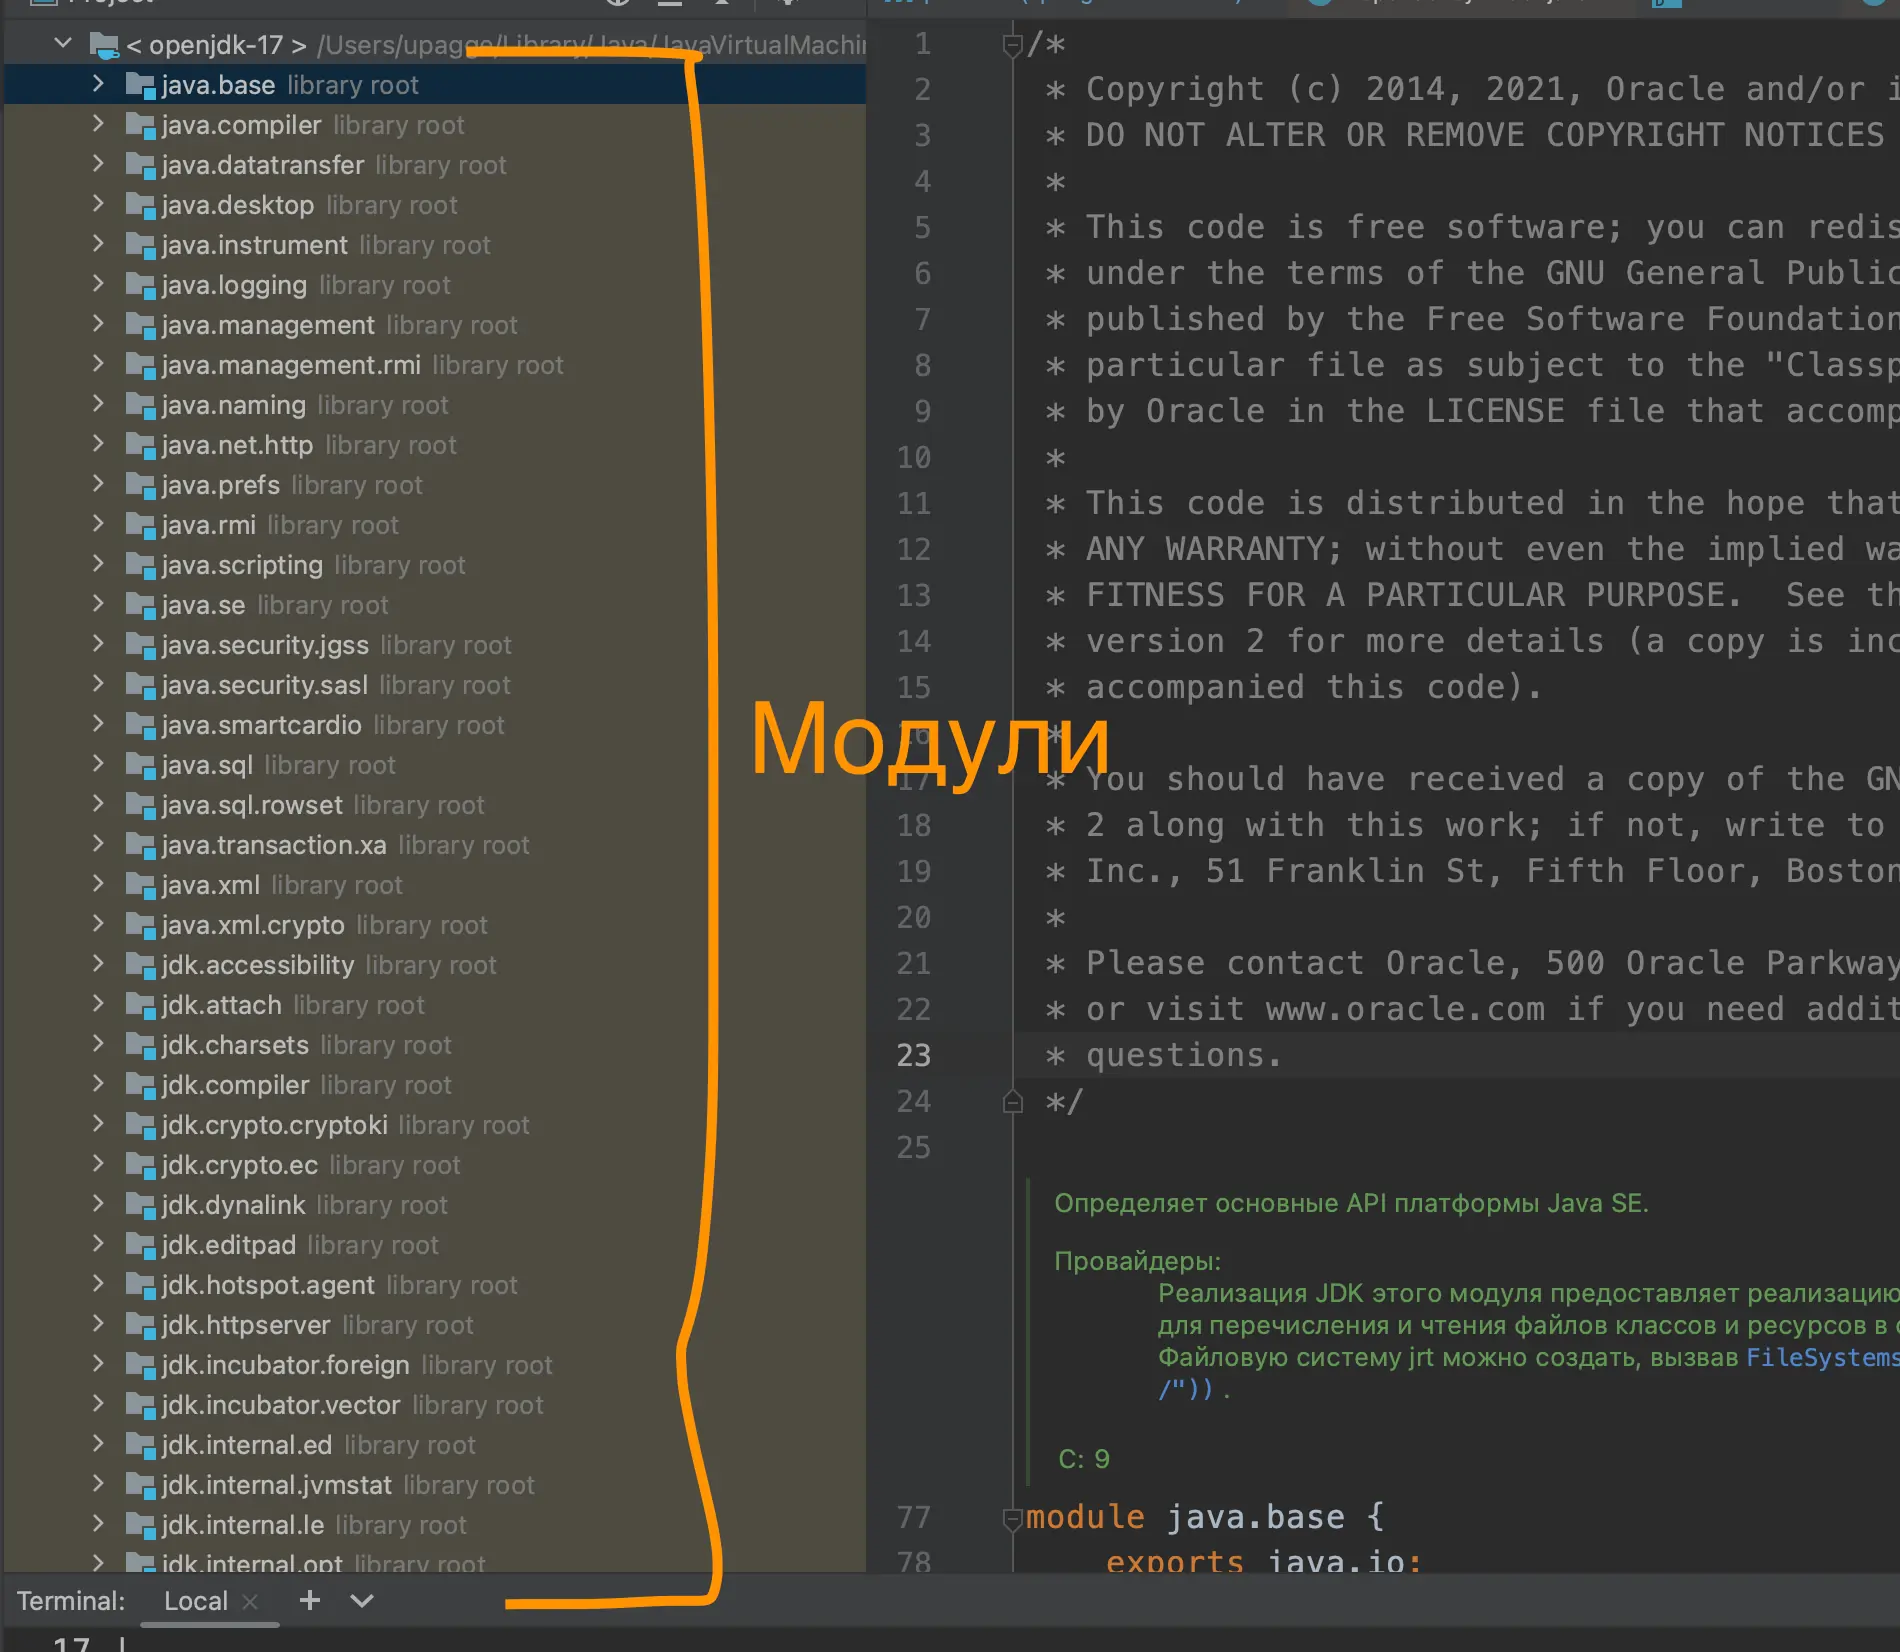
The first thing we'll do is reduce the JDK size. This is possible thanks to modules added since Java 9. All classes in the JDK have been divided into these modules. We will use only those that are truly necessary.
But how do you know which modules are needed for the application and which are not? Moreover, you must also consider all application dependencies. If they use a class from a module you don't include, the application will either fail to build or crash at runtime.
To determine the necessary modules, use the jdeps utility located in the bin folder of your JDK. But first, we need to build our JAR and get all dependencies. To do this, run the command:
mvn clean install dependency:copy-dependencies
Scan all the obtained JARs:
jdeps --ignore-missing-deps -q -recursive --multi-release 9 --print-module-deps --class-path 'target/dependency/*' target/*.jar
The --multi-release 9 flag may not be suitable for you; try changing it.
This command will output the module names used by the application and all dependencies. In my case, they are:
java.base, java.compiler, java.desktop, java.instrument, java.management, java.prefs, java.rmi, java.scripting, java.security.jgss, java.sql.rowset, jdk.httpserver, jdk.jfr, jdk.unsupported
Now that we know which JDK modules are involved in the application, let's build our custom JDK from these modules using the jlink utility.
jlink --add-modules [your_modules_here] --strip-debug --no-man-pages --no-header-files --compress=2 --output javaruntime
Replace the value for the --add-modules flag with the package names found by jdeps. After running this command, you will get a javaruntime folder in the project root. This is a trimmed-down version of the JDK specifically for your JAR. In my case, the trimmed version weighs 50 MB, while the full JDK weighs 315 MB.
Now let's optimize the spring-boot-jar. I think it's no secret that you can simply unpack the spring-boot-jar using an archiver:
Here you can find all dependencies, including Tomcat, code, and application resources. It makes sense to organize everything into layers as spring-plugin and Jib do.
But before unpacking our JAR with an archiver, let's use the layertools utility. It allows us to unpack our JAR a bit smarter.
Create a separate folder and navigate to it:
mkdir build-app && cd build-app
Then run the unpacking command:
java -Djarmode=layertools -jar ../target/*.jar extract
You should see four folders:
- application: Your code is here.
- snapshot-dependencies: Snapshot dependencies are here.
- spring-boot-loader: Spring boot loaders are here.
- dependencies: Release dependencies are here.
Now it's time to combine all this knowledge into a single Dockerfile.
   FROM eclipse-temurin:17 as app-build  ENV RELEASE=17
WORKDIR /opt/build  COPY ./target/spring-boot-*.jar ./application.jar
RUN java -Djarmode=layertools -jar application.jar extract  RUN $JAVA_HOME/bin/jlink \         --add-modules `jdeps --ignore-missing-deps -q -recursive --multi-release
        ${RELEASE} --print-module-deps -cp 'dependencies/BOOT-INF/lib/*':'snapshot-dependencies/BOOT-INF/lib/*'
        application.jar` \
         --strip-debug \         --no-man-pages \         --no-header-files \         --compress=2 \         --output jdk  FROM debian:buster-slim  ARG BUILD_PATH=/opt/build  ENV JAVA_HOME=/opt/jdk  ENV PATH "${JAVA_HOME}/bin:${PATH}"  RUN groupadd --gid 1000 spring-app \  && useradd --uid 1000 --gid spring-app --shell /bin/bash --create-home spring-app  USER spring-app:spring-app  WORKDIR /opt/workspace  COPY --from=app-build $BUILD_PATH/jdk $JAVA_HOME  COPY --from=app-build $BUILD_PATH/spring-boot-loader/ ./
COPY --from=app-build $BUILD_PATH/dependencies/ ./  COPY --from=app-build $BUILD_PATH/snapshot-dependencies/ ./  COPY --from=app-build $BUILD_PATH/application/ ./  ENTRYPOINT ["java", "org.springframework.boot.loader.JarLauncher"]
If the project does not use snapshot dependencies, remove 'snapshot-dependencies/BOOT-INF/lib/' from the jlink command. Otherwise, the build will fail because the /BOOT-INF/lib/ folders will not exist.
To build this Dockerfile on Windows, replace 'dependencies/BOOT-INF/lib/':'snapshot-dependencies/BOOT-INF/lib/' with 'dependencies/BOOT-INF/lib/';'snapshot-dependencies/BOOT-INF/lib/'. The difference lies in the delimiter: Linux uses ':', while Windows uses ';'.
It may look intimidating, but by now, you are familiar with most of it. Don't forget to run the command mvn clean package to get the target folder with the JAR file.
The Dockerfile contains 2 FROM commands. This is called a multi-stage build. In the first stage, we build the necessary JDK for our application, and in the second stage, we build the image. The subtlety here is that in the second build stage, we only take the necessary files, namely the JDK files.
Let's break down the first stage. It doesn't matter which base image you specify; the important thing is that JDK is installed there. We transfer our JAR there, then unpack it, determine the dependencies used, and build the JDK. With that, the first build stage is complete. Let's move on to the second stage.
Here, as the base image, we use an image on which the application will run at runtime. Usually, this is the thinnest possible Linux. Next, we specify the JAVA_HOME environment variable and add it to PATH.
After that, we copy our JDK and JAR layers from the previous build stage. To do this, along with COPY, we use the --from=app-build flag, which indicates that we are copying files not from our machine but from the build stage under the alias app-build. Don't forget about the sequence; the less chance of a layer changing, the earlier it is specified. The last line specifies the Spring loader that will launch our application.
If desired, you can also separate the resources folder into a separate layer.
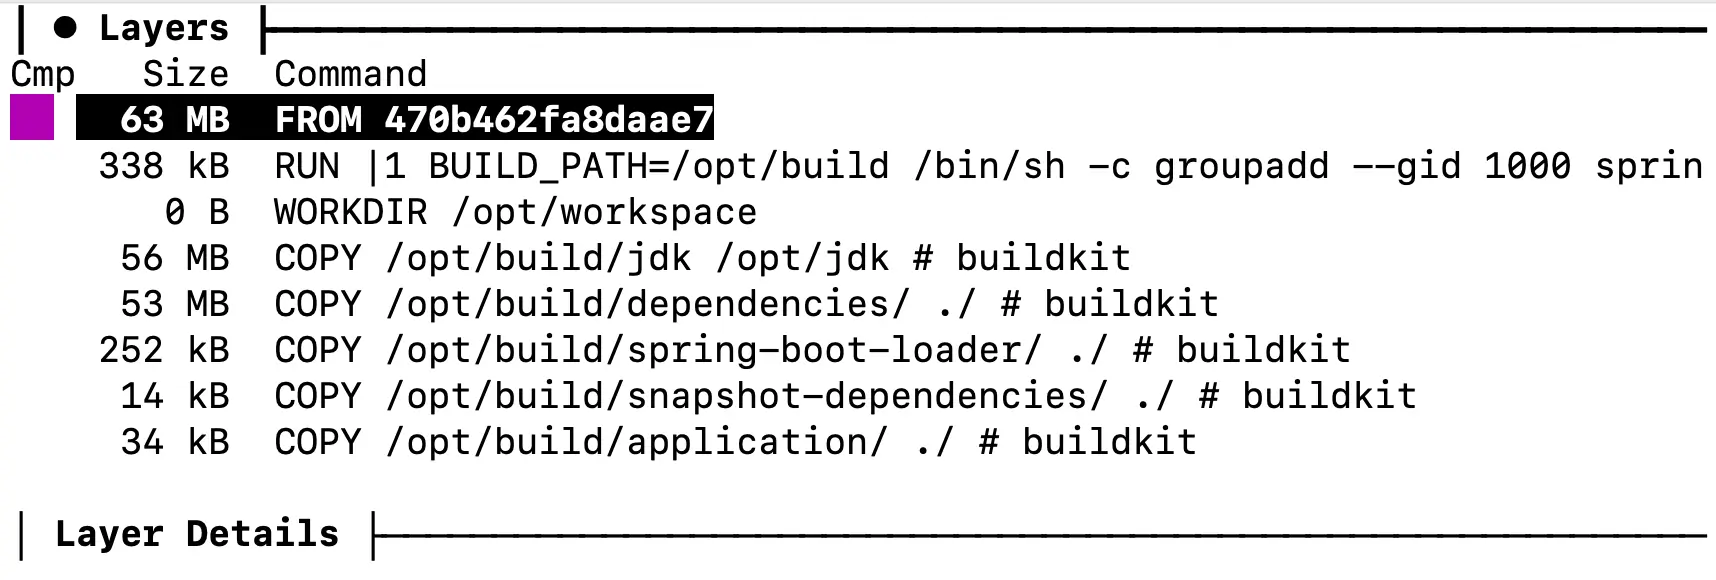
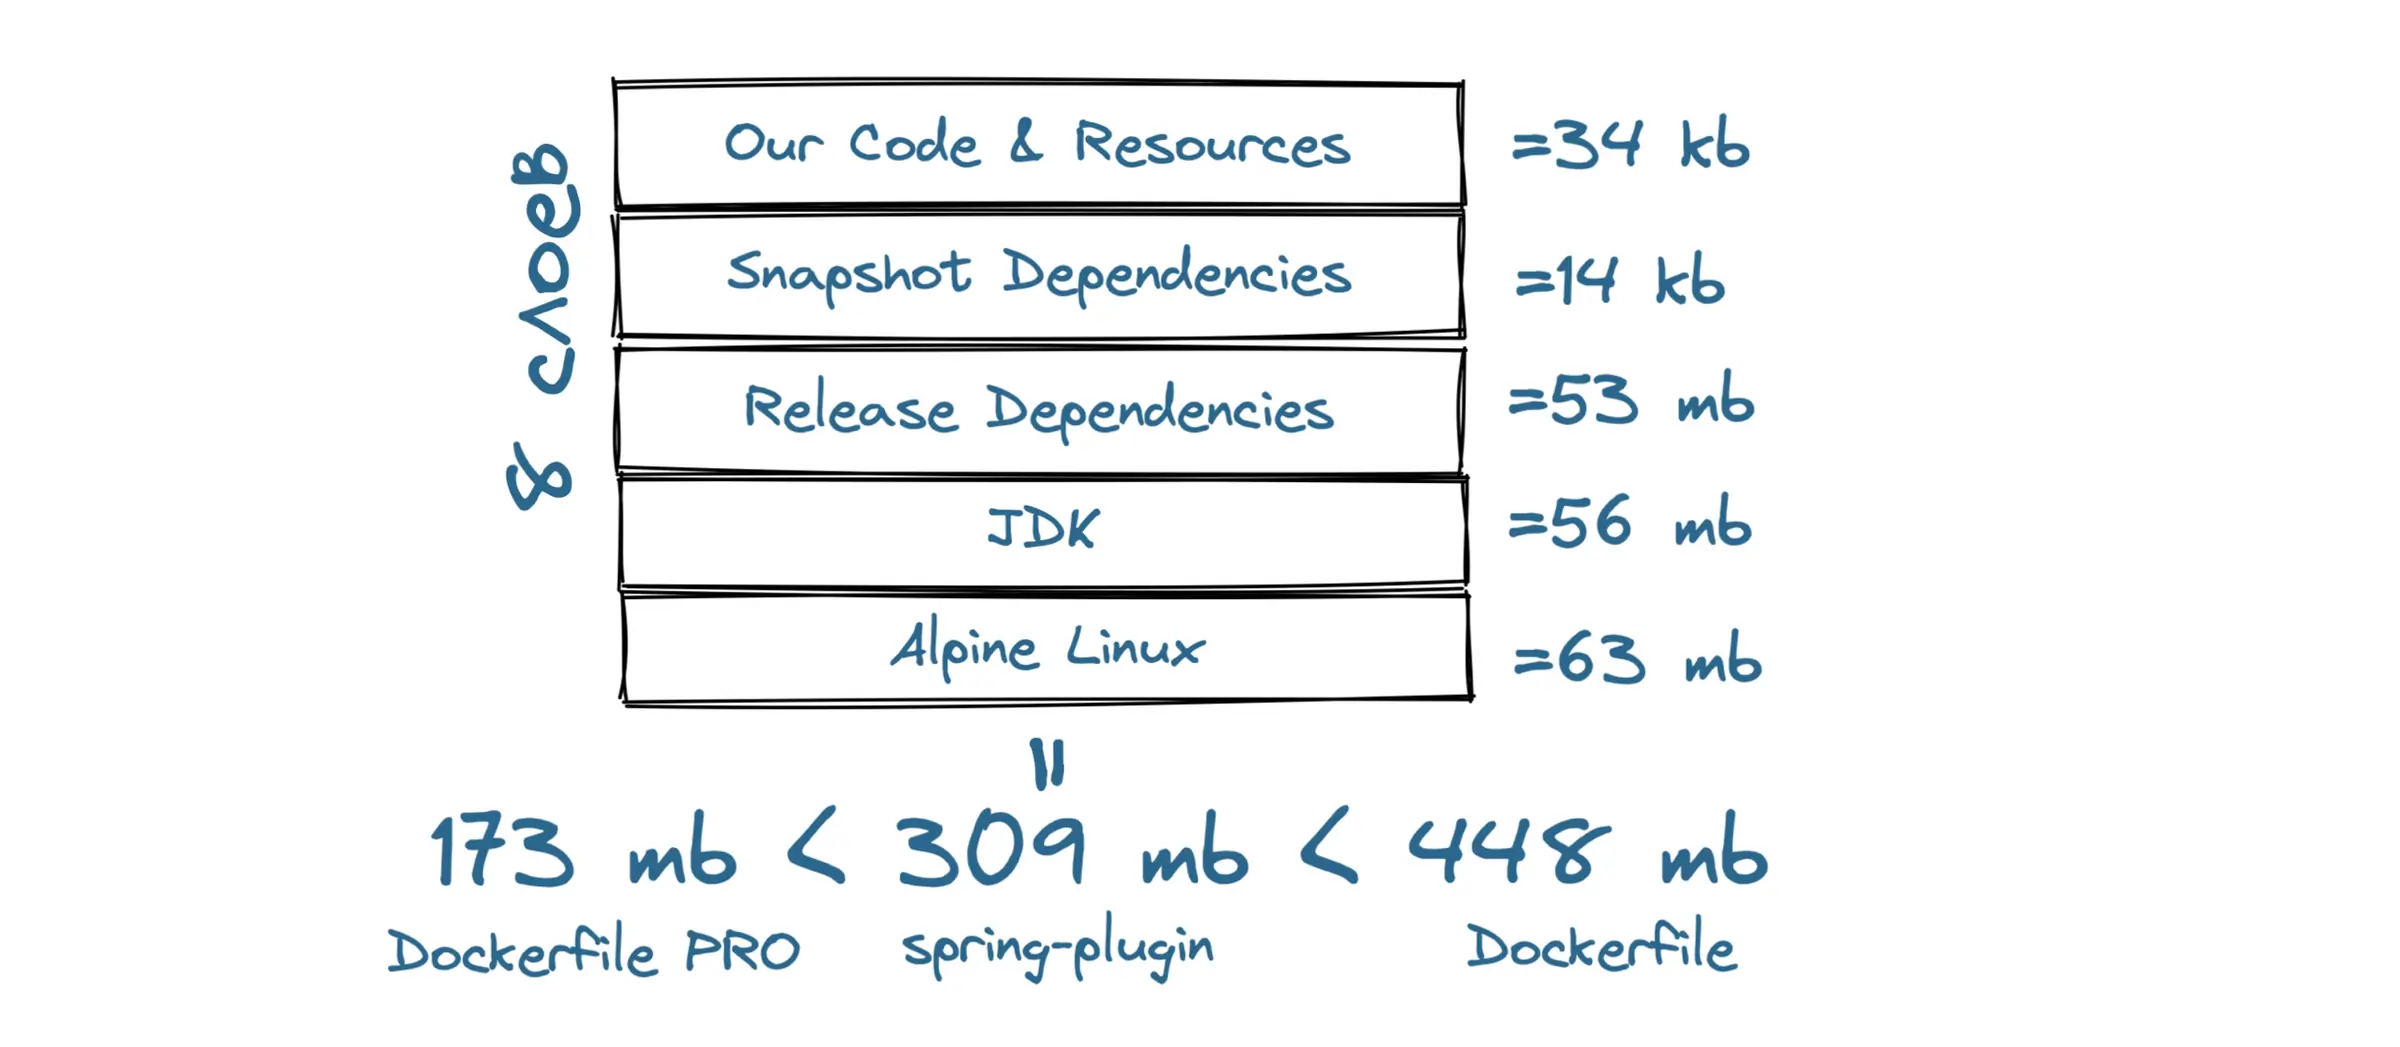
Let's explore the image layers. Our image weighs only 173 MB:
- 63 MB — Linux;
- 338 KB — added due to user creation;
- 56 MB — our custom JDK;
- 53 MB — release dependencies;
- 252 KB — Spring loaders;
- 14 KB — snapshot dependencies;
- 34 KB — our code and resources.
Conclusions on Dockerfile-pro:
We've eliminated almost all the downsides of Dockerfiles, turning them into advantages. With this build, you have the opportunity to customize everything to your liking. It's worth noting that this is the smallest image of all.
You can also use build capabilities for different platforms, a feature that plugins lack.
In summary:
In this article, we've explored various ways to create images. Each method has its pros and cons.
If you need quick results, use the spring-boot-maven-plugin or Jib. Remember that they currently cannot build images for ARM processors, and Jib runs the application on behalf of the root user.
A properly written Dockerfile will be the best option for a large system. Pay special attention to writing your Dockerfile.


