The optimal Docker image for Spring Boot. Part 2

The article covers using the spring-boot-maven-plugin to package Spring Boot applications into optimized Docker images with improved caching and no need for a Dockerfile.
Published on October 15, 2024 by Roman Surkoff
springboot docker optimization image post
5 min READ
This article discusses the use of the spring-boot-maven-plugin to simplify the process of packaging Spring Boot applications into Docker images. The plugin allows developers to easily create a Docker image without manually writing a Dockerfile, while also optimizing the image structure by layering dependencies for better caching. The article explains how to configure the image name, build the Docker image using Maven, and analyze the resulting layers for more efficient deployment.
Spring Boot Plugin
Spring Boot simplifies development to the maximum. Added a couple of starters, filled in the application.properties, and voilà, the microservice is ready. Seriously, take a look at the Spring Data REST project, which generates controllers based on JpaRepository.
Obviously, something was also invented for containerization. And it's the good old spring-boot-maven-plugin. It can not only transform a regular JAR into a JAR file with an embedded Tomcat but also build a full-fledged Docker image.
First, in the plugin configuration, let's specify the name of the future image. If you don't specify a tag, it will automatically be set to the latest.
<build>
      <plugins>
        <plugin>
          <groupid>org.springframework.boot</groupid>
          <artifactid>spring-boot-maven-plugin</artifactid>
          <configuration>
            <imagename>upagge/spring-boot-docker:spring-plugin</imagename>
          </configuration>
        </plugin>
      </plugins>
</build>
# Image version # If you want to specify the image version, you can do so using Maven project variables:upagge/spring-boot-docker:${project.version}
To build, run the command:
mvn spring-boot:build-image
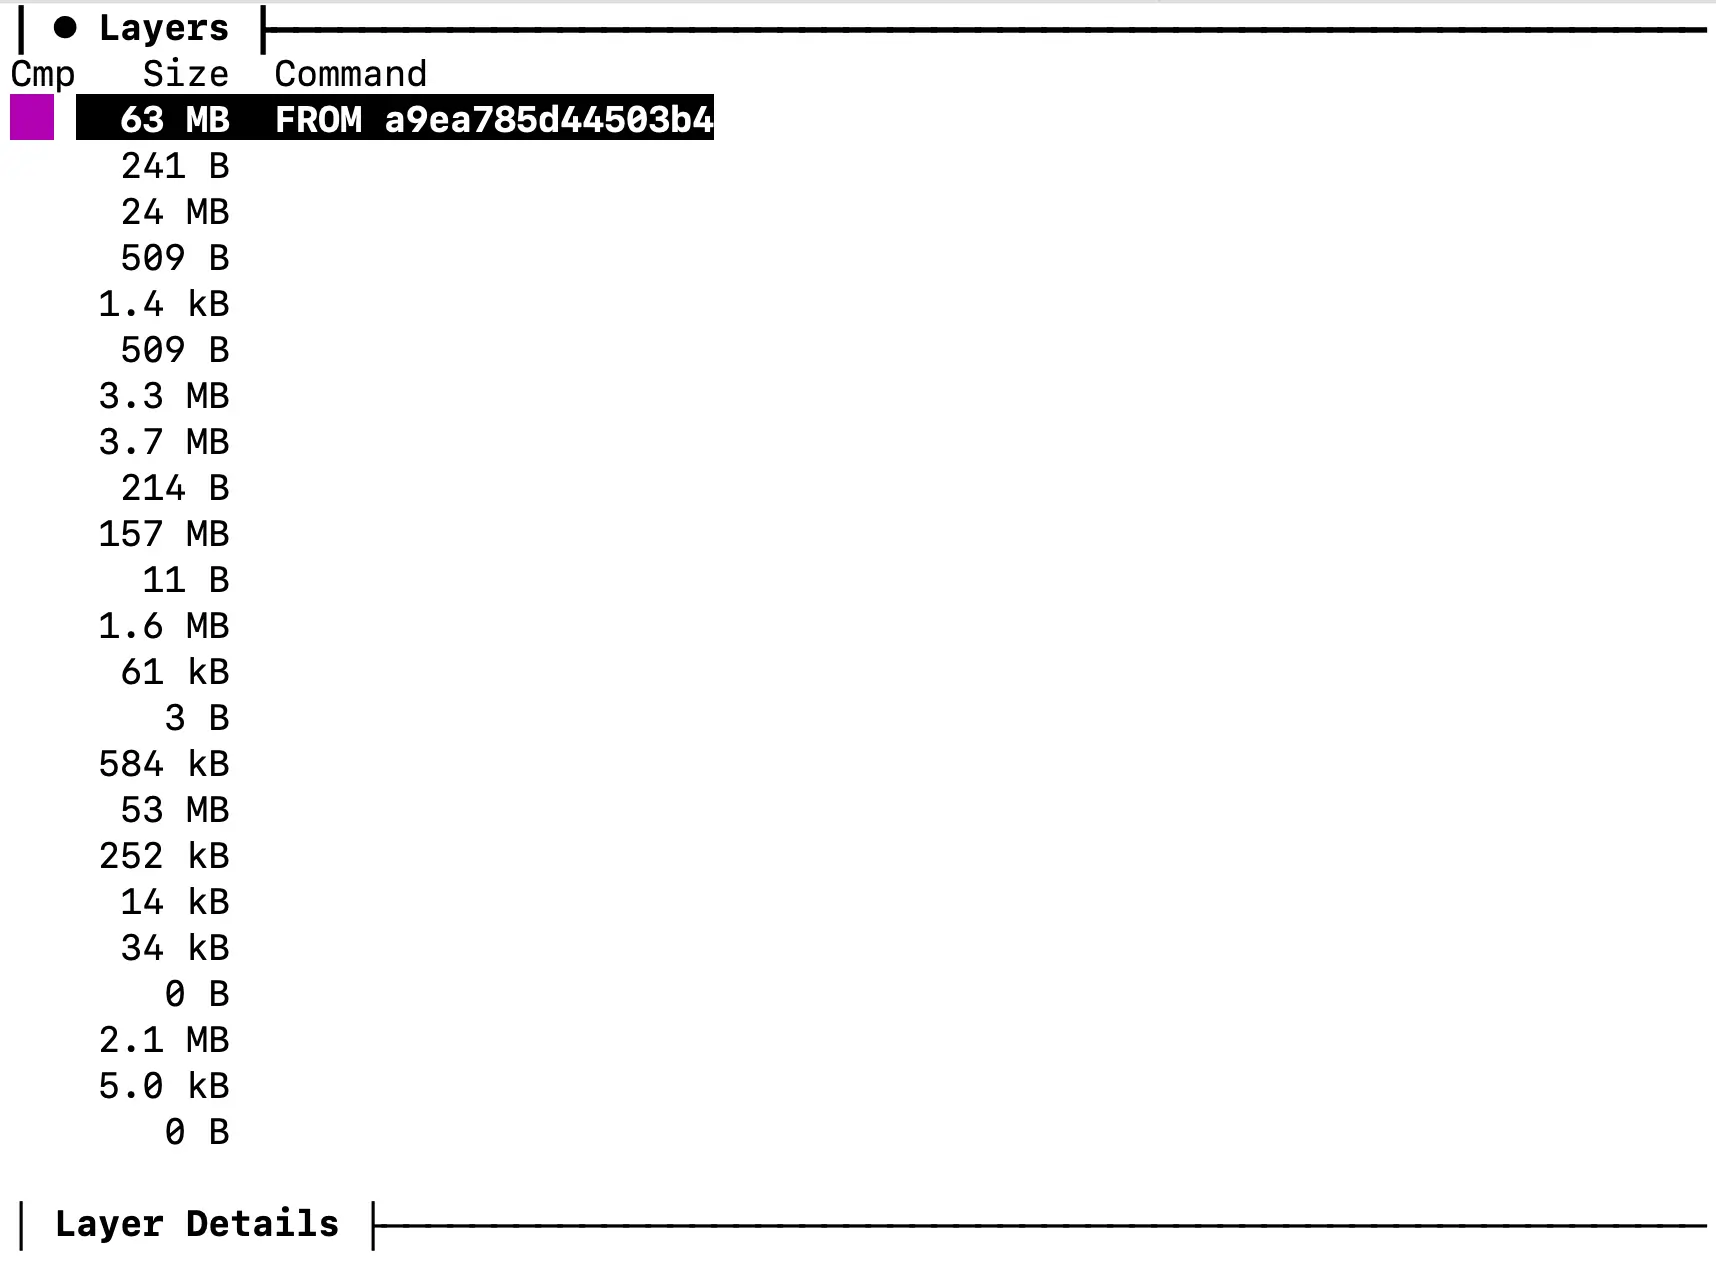
And voilà, we have a working image. Let's explore the layers created by Spring:
dive upagge/spring-boot-docker:spring-plugin

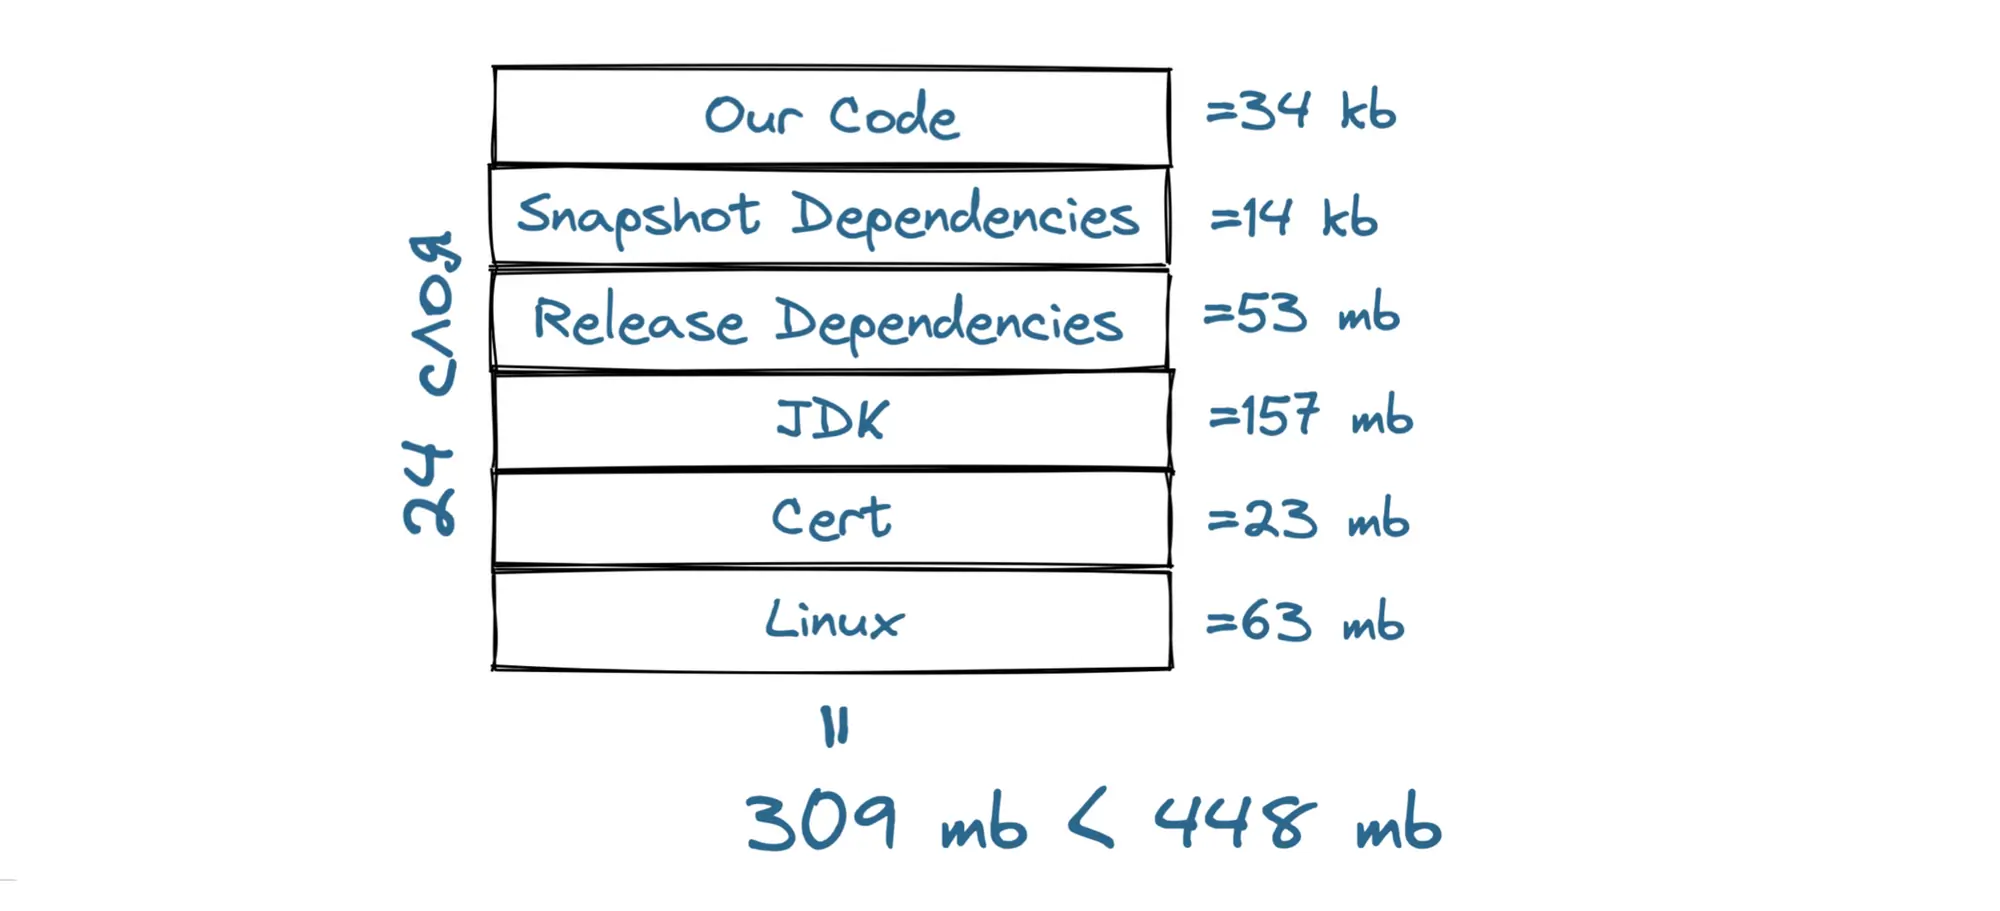
The created image weighs 309 megabytes, which is 139 megabytes less than the one we built ourselves. But even more notable is the structure of the image.

- 63 mb - still Linux;
- 24 mb - various certificates;
- 1.4 kb - clearly adds a user, on behalf of which the application will run;
- 157 mb - layer with JDK;
- 53 mb - separate layer of release dependencies;
- 252 kb - layer with all Spring Boot loaders;
- 14 kb – layer of snapshot dependencies;
- 34 kb - actual code we wrote and resources for it;
An important optimization has been made here - application dependencies are placed in separate layers. Thanks to this, they will also be cached and reused by Docker. Therefore, when making changes to the code, you will be sending not 53 megabytes (jar weight), but only 3-5 mb.
Moreover, an important feature is that snapshot dependencies are placed in a separate layer from the release dependencies. After all, the likelihood of their changes is much higher.
Let's launch our container.

Notice how much information was provided to us before starting. Spring has made some optimizations for us, as reported in this log:
- It clearly still doesn't know how to build images for M1.
- Set up 5 active processors.
- Calculated available memory for JVM. And then distributed it.
- Displayed all additional keys applied at startup.
Conclusions on the spring-plugin
An even simpler packaging method that uses optimizations because it understands the peculiarities of Spring Boot Java applications. The main thing is to monitor what it does under the hood so that these advantages do not turn into problems.
If you have an arm processor, the image will still be built for amd64.
A separate user is created to run the application. This is considered a more secure method.
Also, we do not need to create a Dockerfile, which does not give us the flexibility in image settings needed for complex projects.
A good packaging method for simple pet projects.